https://www.facebook.com/groups/tankgirl/
Day 1
3.5 Hours including a Little research
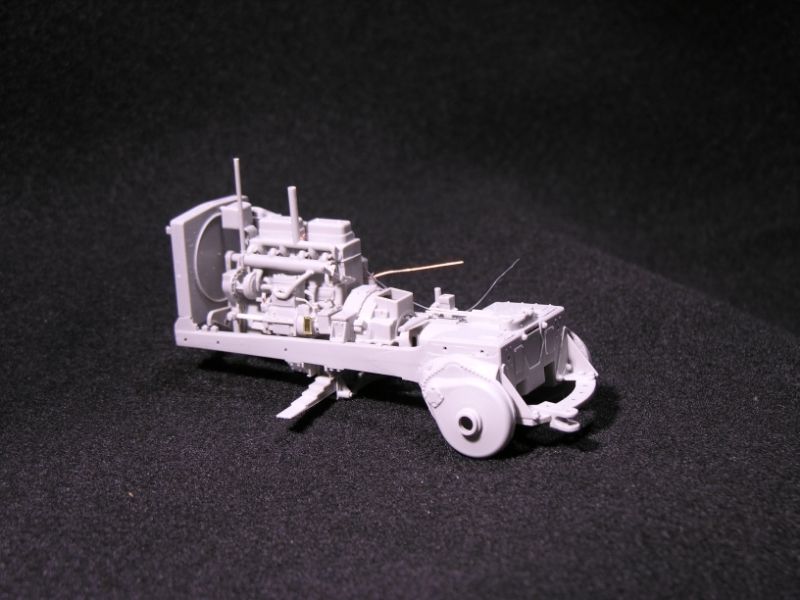
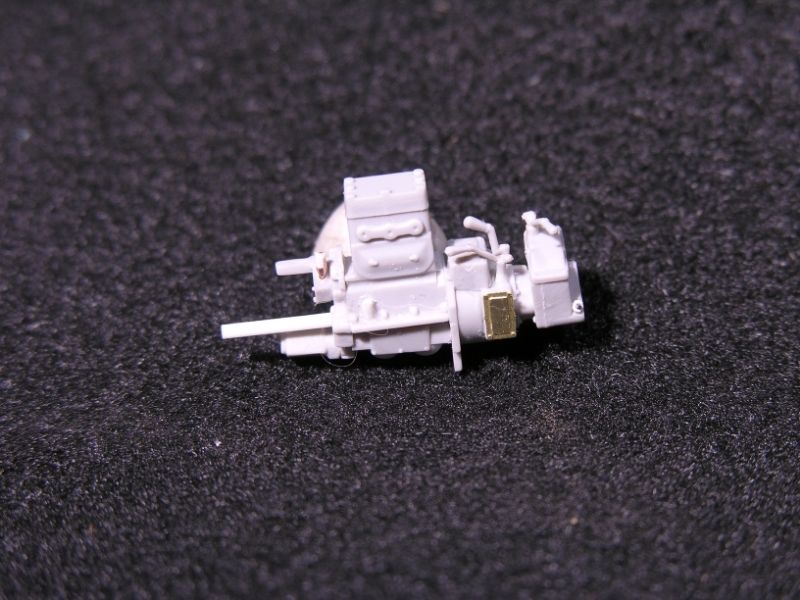
After getting all the trees out and started inspecting them I do have to say the detail is pretty clean and crisp.
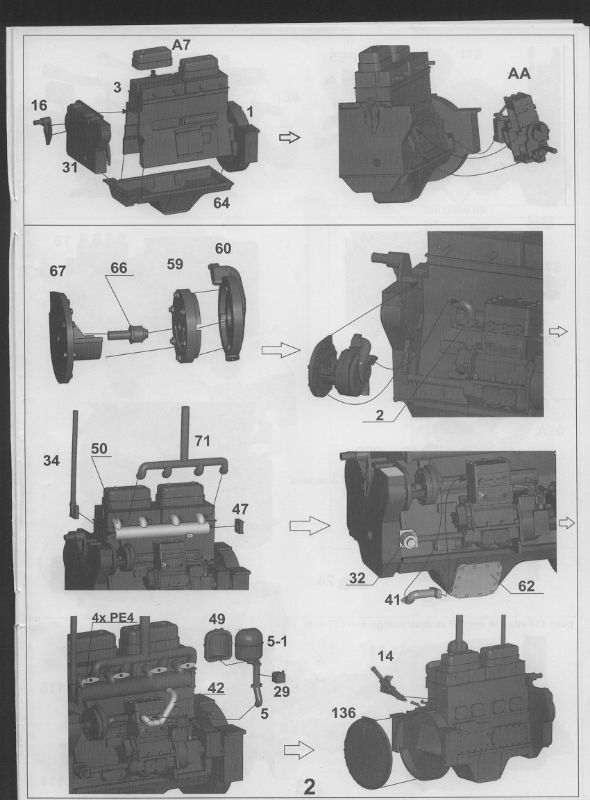
As for the instructions they are pretty straight forward CAD Drawings but seem clear enough so far to me. Now as it goes for the part layout/numbering on the tree. Absolutely no order, rhyme or reason, The parts are just strung out all over the place so I hope you like the old game of "Where's Waldo" as you will be hunting around trying to find the right part.
One draw back is the attachment points are huge on some of the parts so you do have to be careful when cutting them off the tree as I found out on the first few parts I removed as the plastic is very soft I ended up dinging the part itself with the nippers so now I am cutting the parts off a fair distance from the attachment point then trimming them with the knife.
Some of the parts I removed have the normal mold lines but clean up pretty easy just be careful as stated before the plastic is very soft and is very easy to damage the part.
As the build goes.
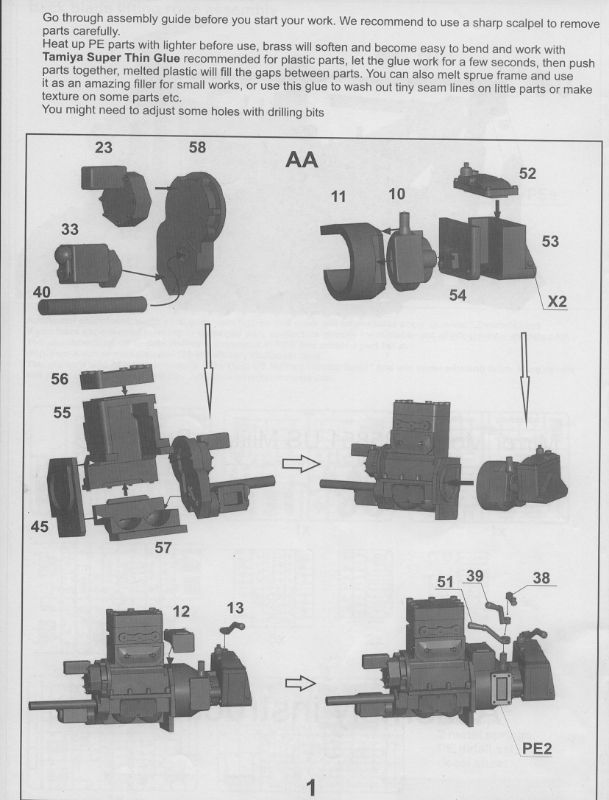
in the first step part 40 is suppose to be a round rod/shaft but my part had a horrible mold line and was flattened out so I just cut a new shaft from a .040 rod much easier and faster the trying to clean it up.
In the second Step the X2 does not mean make 2 it is actually the part number of a separate bolt/plug head. (It only took me 5 minutes of looking through all the parts trying to find 2 of each part to figure that one out)
I decide to just punch out my own bolt/plug head from 020 styrene over trying to cut off the microscopic bolt and trying to clean it up. I ended up gluing down the disk the drilling it and installing a piece of .015 solder in the middle and squaring it off like the plug on the real one.
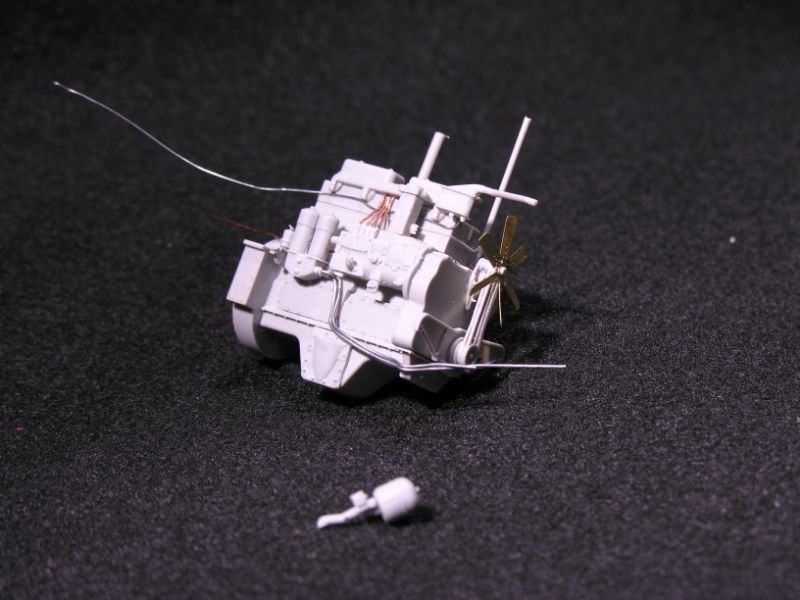
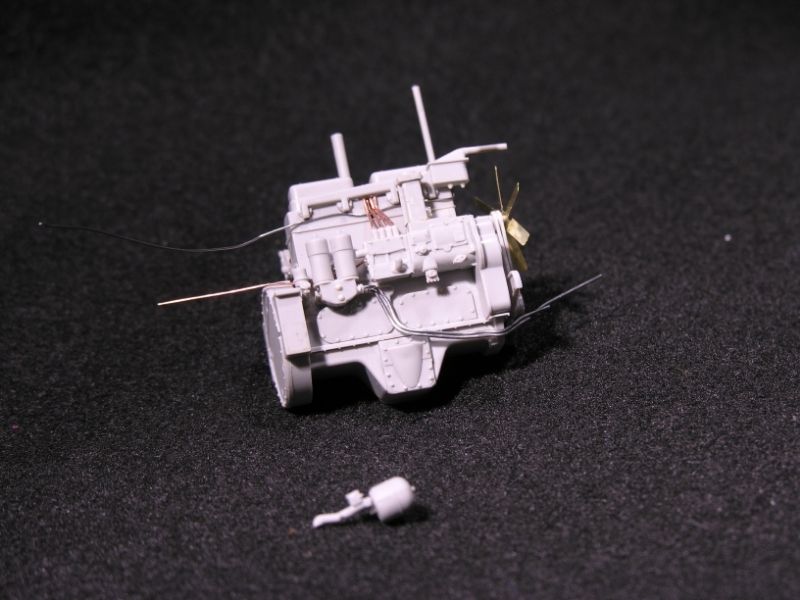
On Part 23 their should be a oil filler tube so I made from copper wire & Rod along with a oil Filler on the front of part 55
(See reference photo.)
The alignment pins are a PIA for part 13 & 51 so I just cut them off and drilled them and added a new .015 rod. When I was cleaning part 38 I heard the dreaded PING of the tweezers and that part is lost to the carpet monster.. I will just make a new one from brass when once the rest is installed so I can just install the linkage at the same time.
So that's it for day 1. Hope you enjoy this and it helps you on your own build.
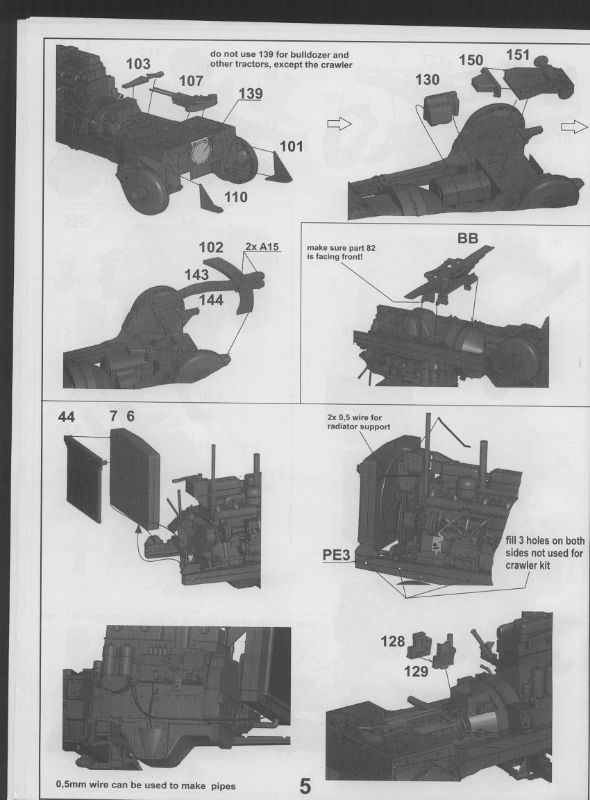
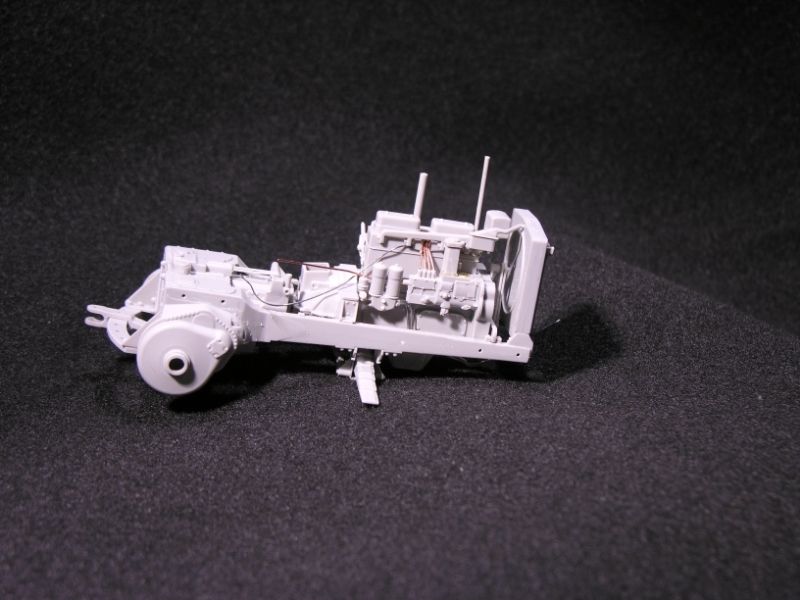
Day 2.
This will be a short one as I am tired. (A cheer from the crowd)
4 hours.
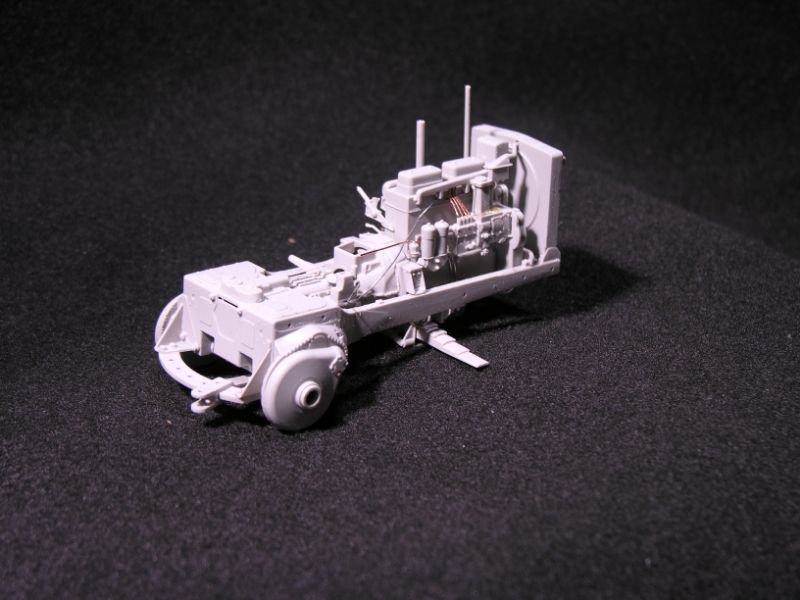
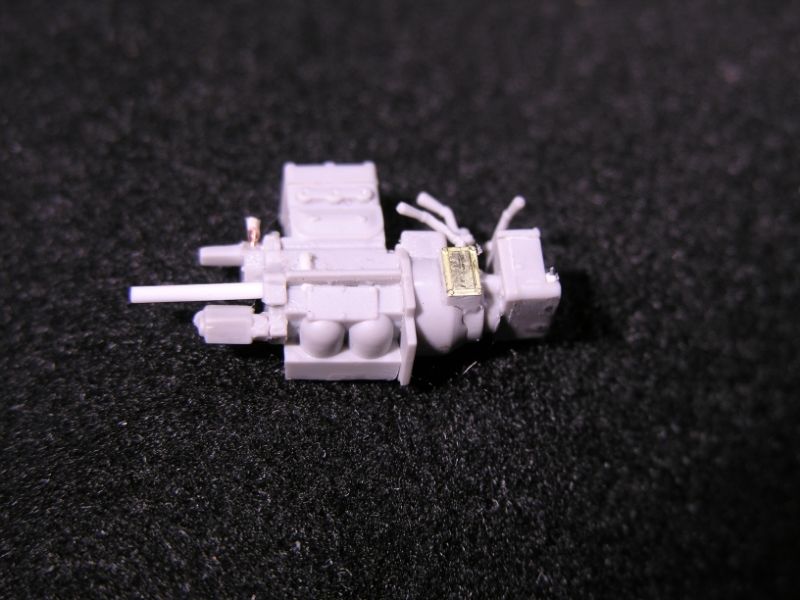
Most of the time was spent cleaning the parts and scratch building the injector lines.
Be super careful taking off the fan belts.. No mater what I did I ended up breaking them a few times. If I was ever to build this again I would make sure to leave them off until final installation. Leaving off the fan and a few other parts until after painting.
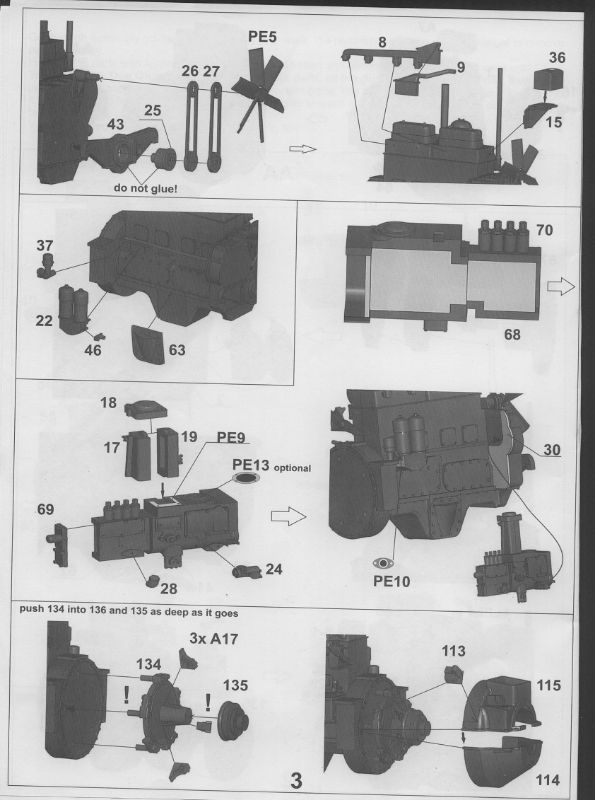
Make sure you put PE10 on part 22 before you fix part22. It was a little easier for me to just remove any alignment pins as some of them create more of an issue then its worth.
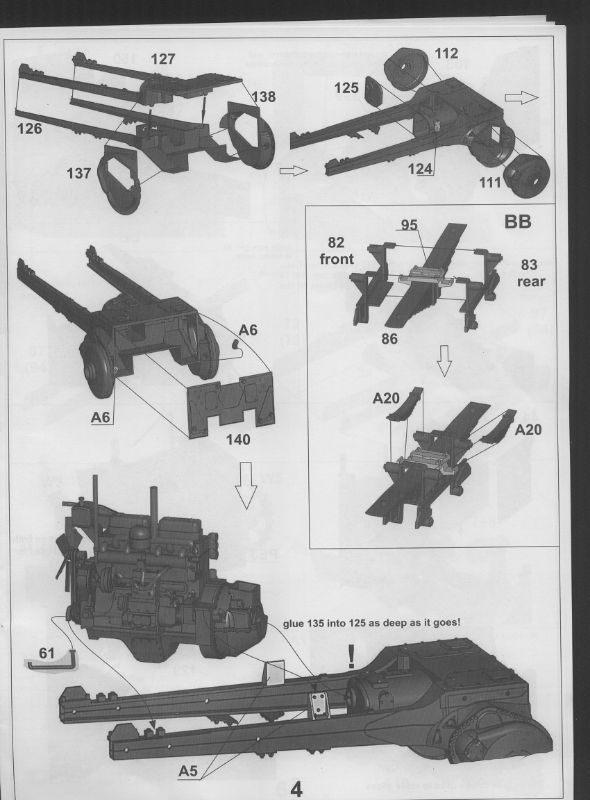
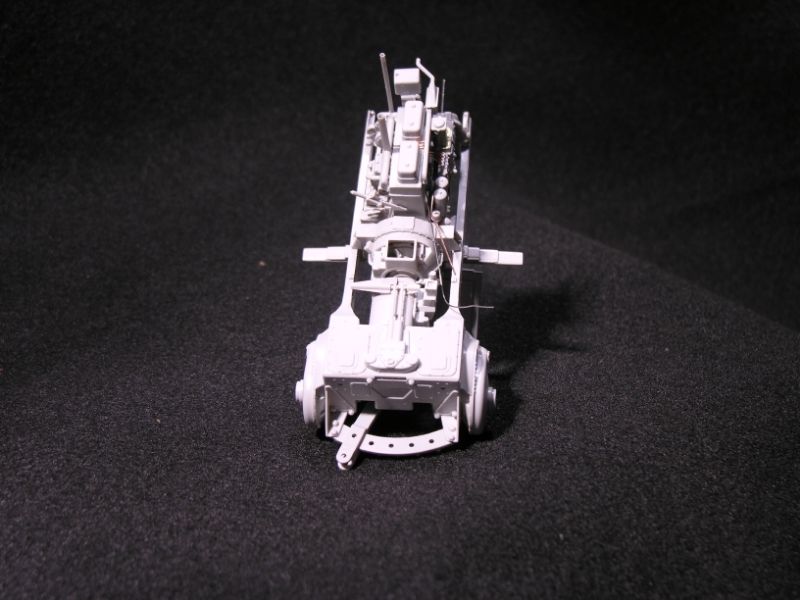
Day 3
4 hours.
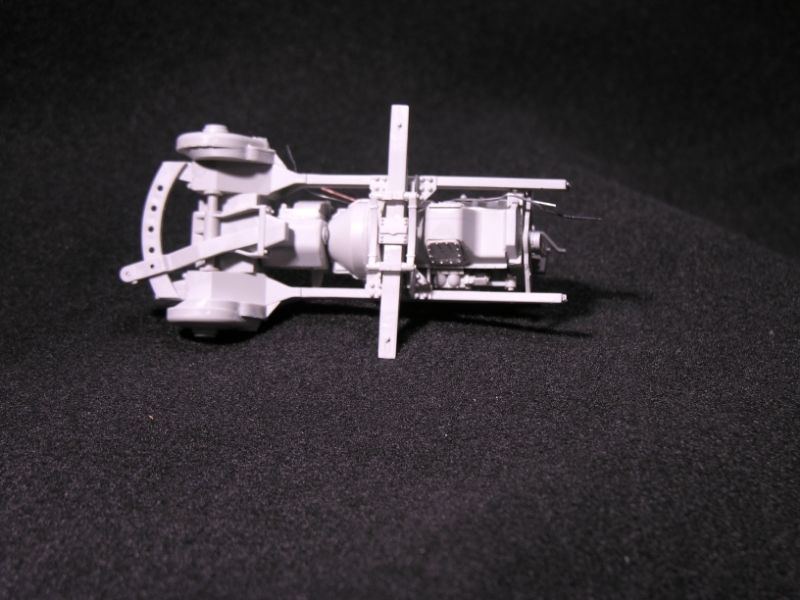
Building the Frame.. After cleaning up the mold lines, This was a Joy. All the parts just fit with just a little sanding the seams once glued.
Not really a lot to say except just go along with the instructions..
I dry fit the engine first then Glued parts A-5 to the engine/transmission and not to the frame so I can remove it for painting and leaving off the radiator and Hoses until after paint.
Parts 143 and 145 need a little work once glued as there is a pretty bad sink hole and seam once glued and from the photos I can find this looks like it was one solid casting. If you just slide part 102 through the slot and just glue that to parts 101 and 110 the hitch is movable so you can attach a tow rope or Pintle Hook for a trailer or Arty. (Long Tom for me. )
It was just a nice relaxing night of assembly..
Really looking forward to start assembling the bogies and track tomorrow.